
Easy Vintage and Repurposed Home Projects
/
If you've been a Lovely Adventurer for a while you probably could have guessed that I'm obsessed with most everything vintage (particularly maps... they are my Kryptonite). We just recently moved into The Lovely Yellow House in August and slowly but surely I've filled the walls with all my treasures.

Our First Home! Hooray!
I am not a patient person. Especially when it comes to crafting or making things. I like my projects to come together quickly and I like for them to be easy. Baking and measuring all the things precisely? no. Sewing intricate items of clothing and following patterns? no thank you. (Thank the Lord for those of you who can because I benefit from both baking and clothes making a little too much)
So, when decorating my home with vintage repurposed projects I want them to be easy and fast so I can get that instant gratification that ruins my brain for all other things that require patience and hard work. Below are a few of the projects I've completed in the last few months and with enough imagination and creativity you can easily create something similar with your vintage treasures!
Project 1: Repurposed Vintage Fabric/Handkerchief Wardrobe
We have limited closet space in our bedroom and so I needed something to hang my ridiculously embarrassing amount of clothing in. I wandered through Target (my other home) and found this beauty:

or should I say... not so beauty. It kind of looks like a spaceship or something I should be quarantined in when I'm sick. So, I stared at it for many days trying to figure out how to make it much more lovely and turned it into this:


Isn't it SO dreamy? It makes me happy every time I walk in our room.
The back and sides are covered in a vintage sheet I've had for years with a pastel floral pattern. I pinned it at the top with safety pins (I can't see the top from anywhere in the room) but you could also certainly hot glue it if you wanted. I told you... I'm all about fast and easy. Safety pins for the win.
The front is made of all my vintage fabrics / handkerchiefs / doilies and ribbons I've been hoarding for years. If you don't have your own hoarding stash... try thrift stores, garage sales and estate sales. You'll have one in no time! I believe in you.
I cut up strips of the fabric and different lengths of the ric-rac and ribbon to add some texture. The vintage handkerchiefs are strung together with... you guessed it... safety pins and some I was able to tie the corners together.


Each strip I straight pinned to the top (so I could move them around if I wanted) and later would safety pin them. Some I tied in knots in different places and others I left straight for a messy romantic look. I love messy and eclectic so get creative and try what works for you!


Once I was finished and had seriously diminished my pile of hoarded fabrics and ribbons (hooray!) and I LOVED the end result. I can easily hang up the fabric strip curtain over the corner and get into the wardrobe when I'm getting ready for the day. I love this, it was so easy and also, so fun! So, if you're a fabric hoarder like me and have a wardrobe or something similar that doesn't match your vibe... try this out!
Project 2: Painted Vintage Couch
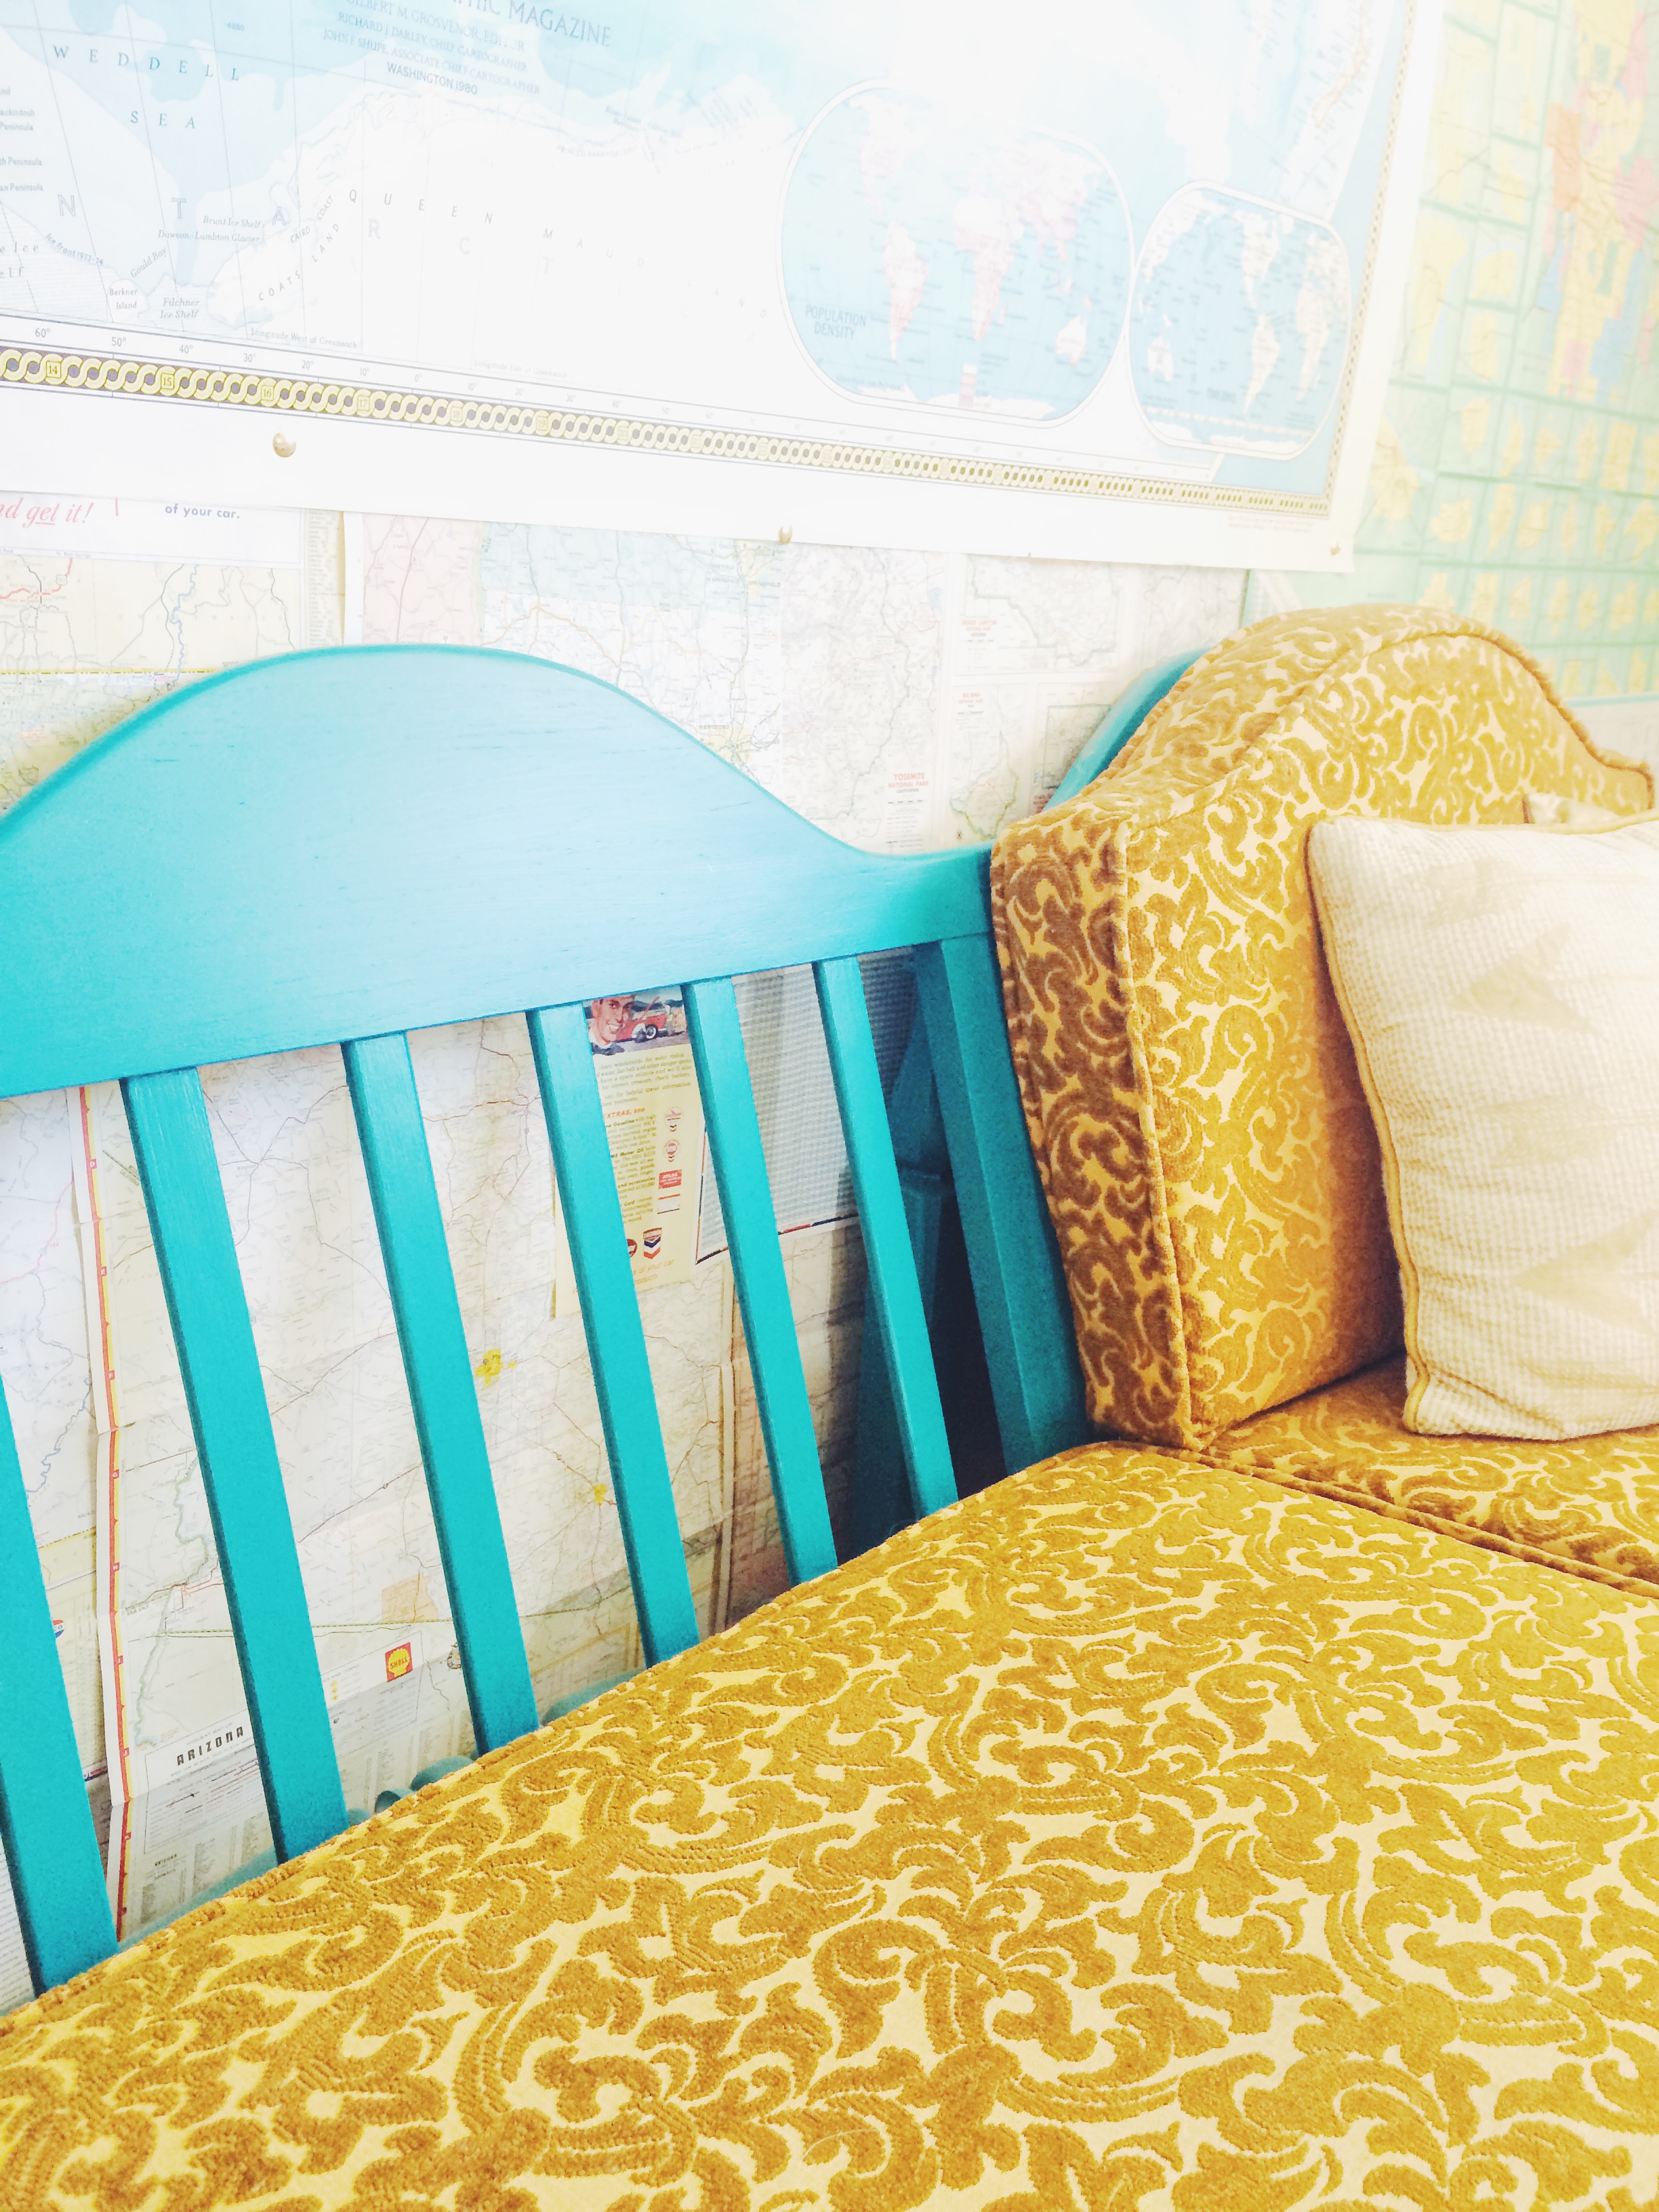
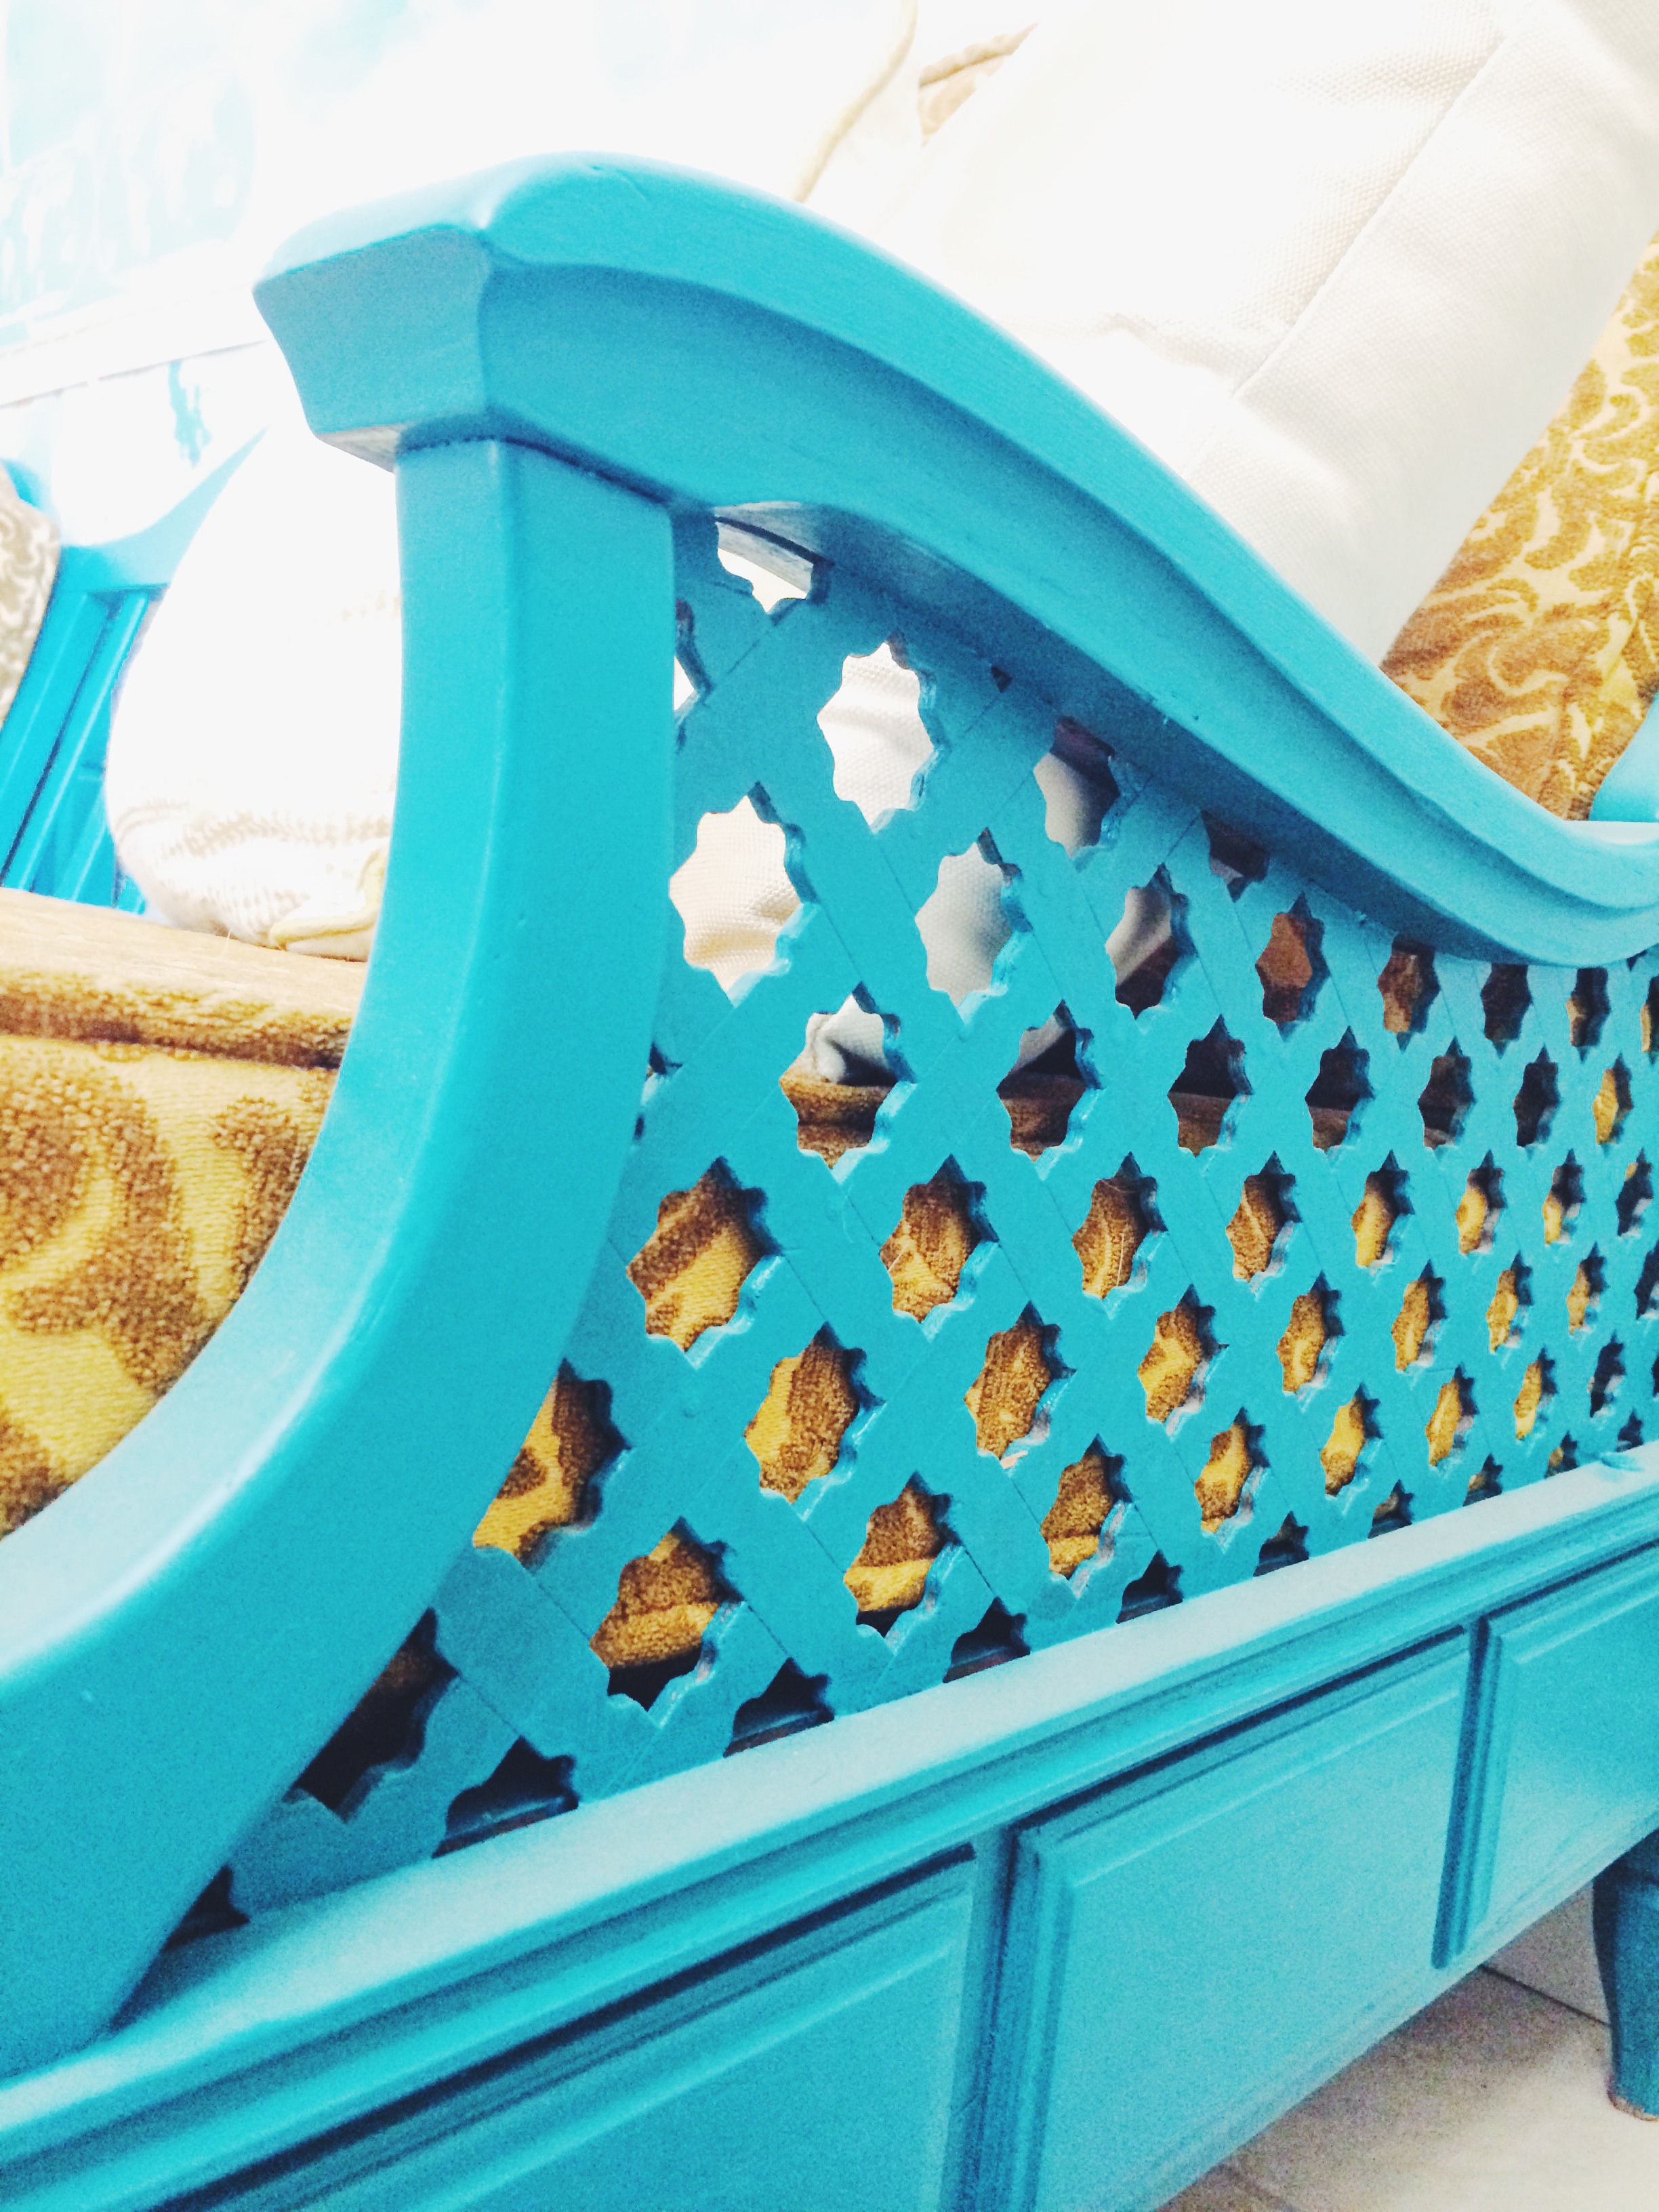
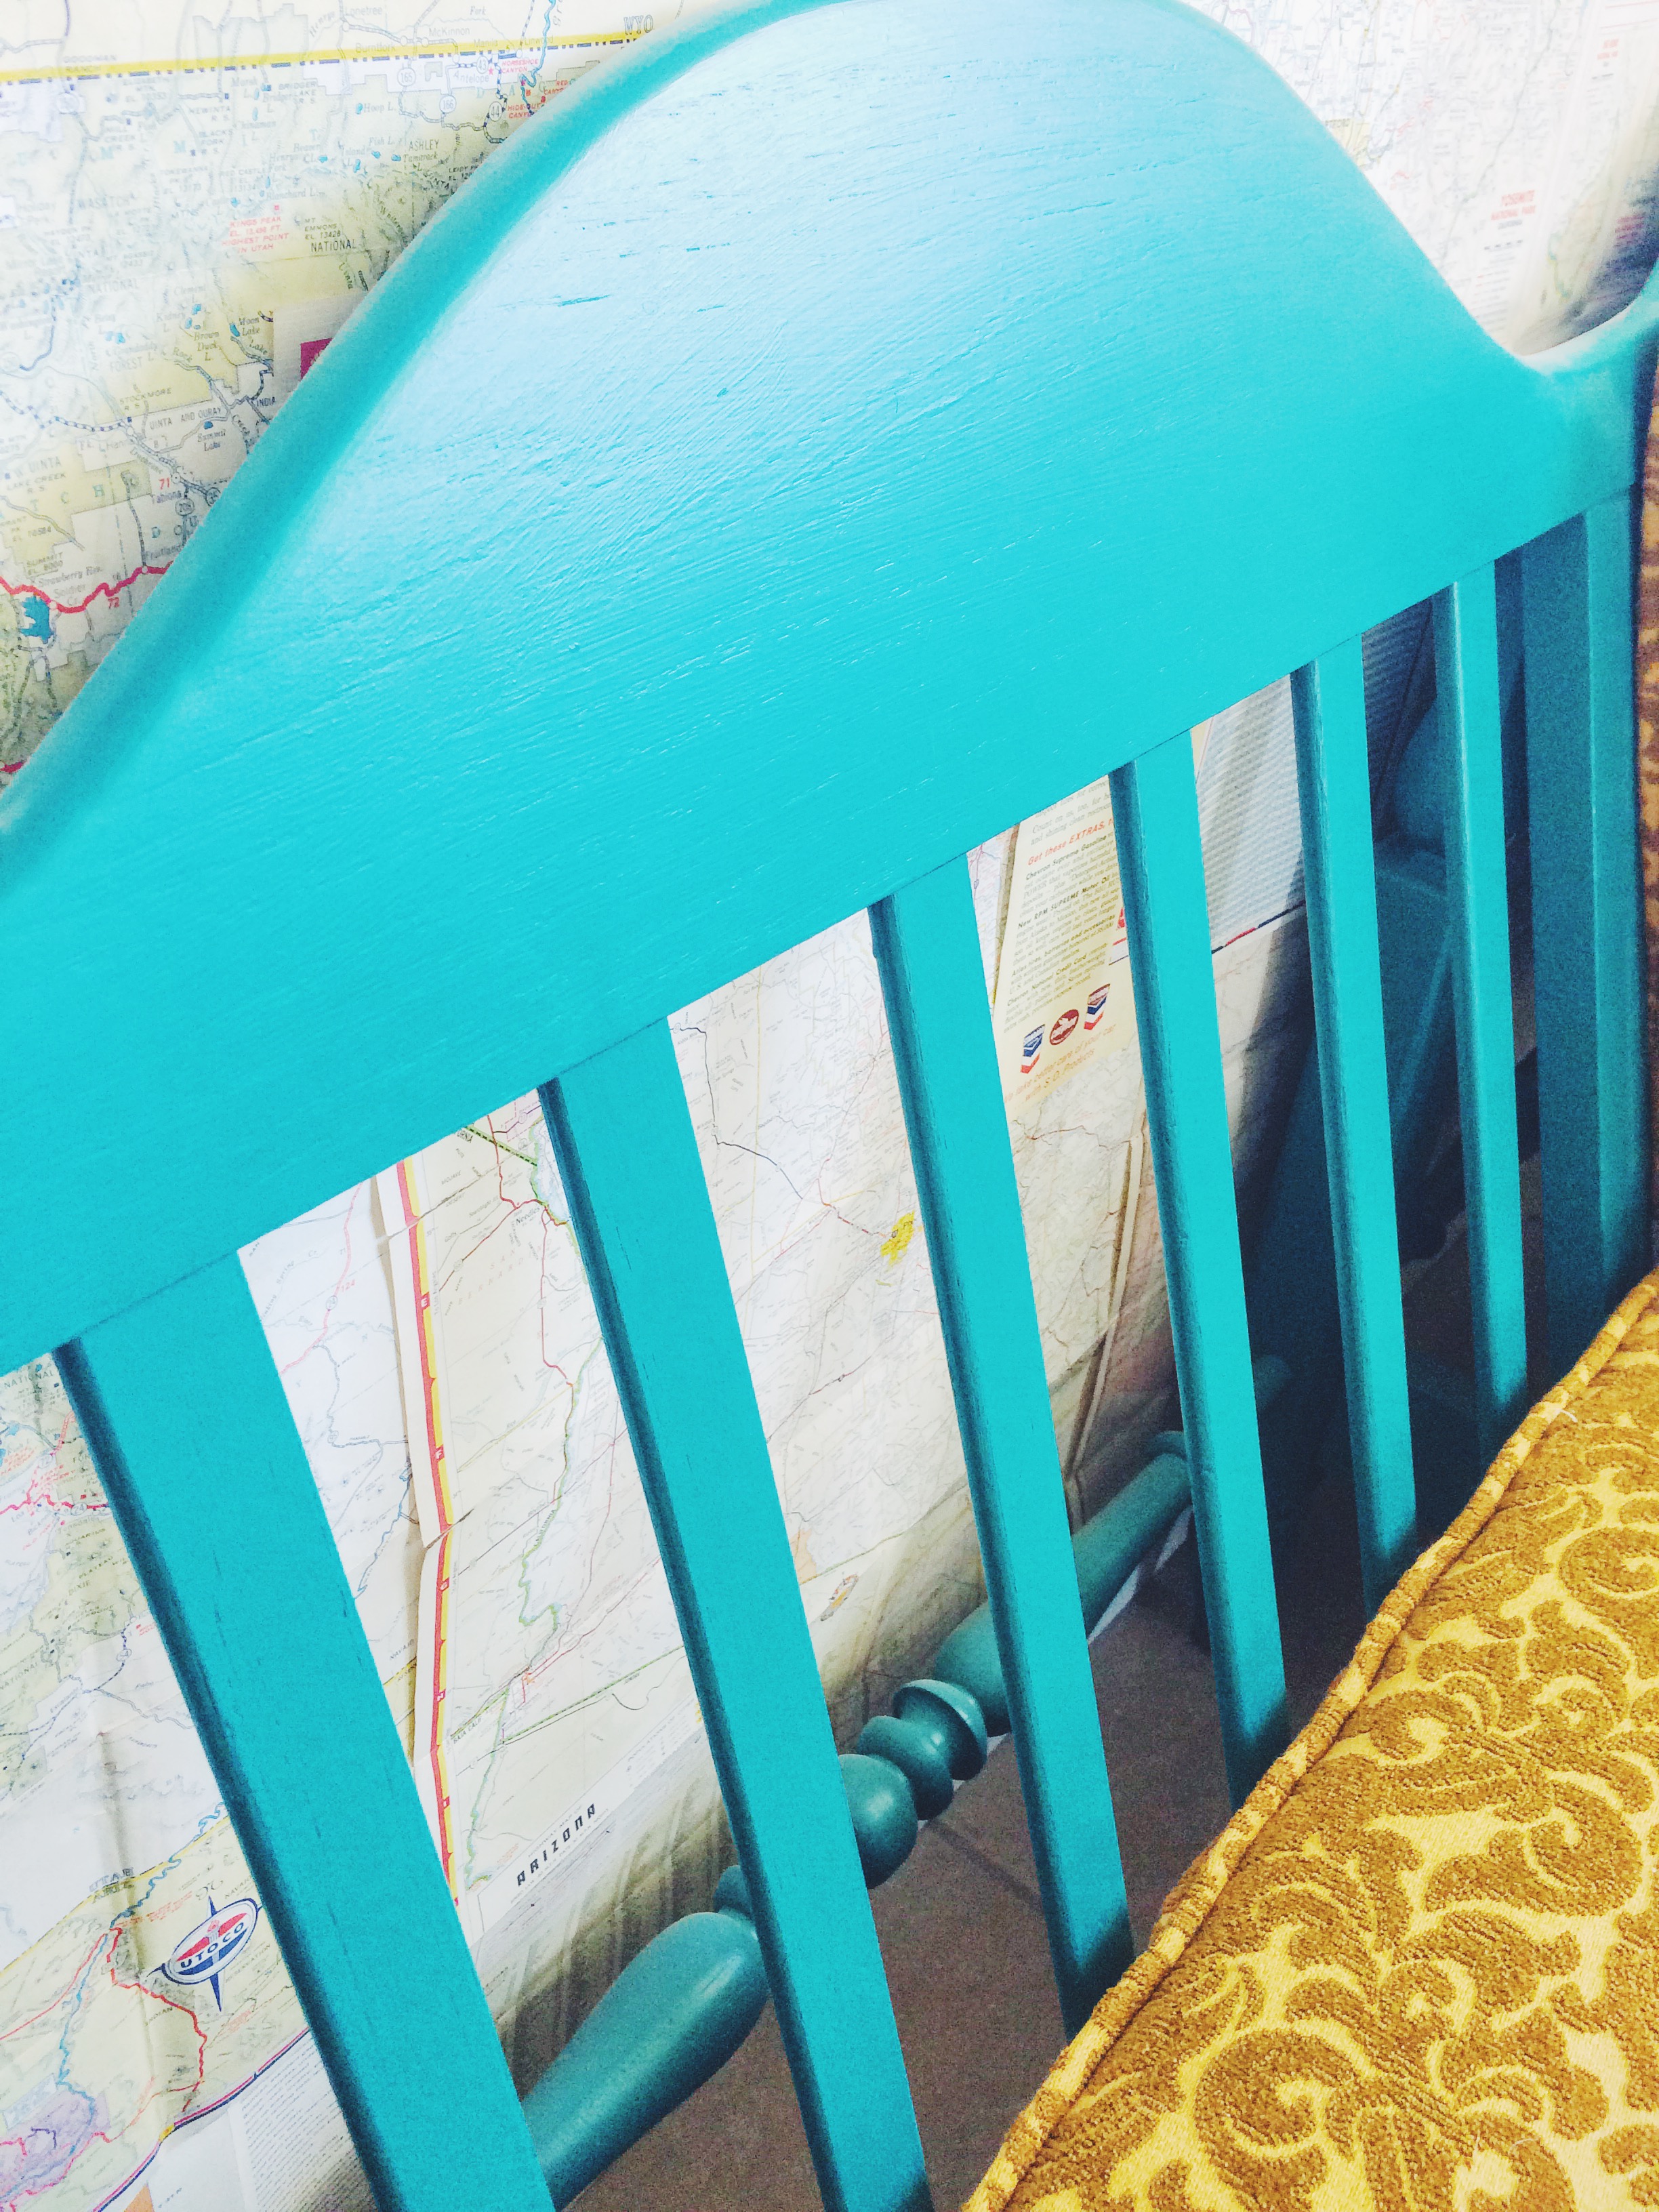
You guys... Estate Sales for President. This couch was $12. For reals. It was not wanted by anyone because well... it was kinda ugly in color.. but its bones were awesome and it is so well made. I love the gold fabric on the cushions... but I wasn't crazy about the medium dark wood stain that was all over the base of the couch. I new I needed to change the color but I was not about to sand all those spindles in the back. oh heck no.
I went to Lowe's and found this miracle paint:
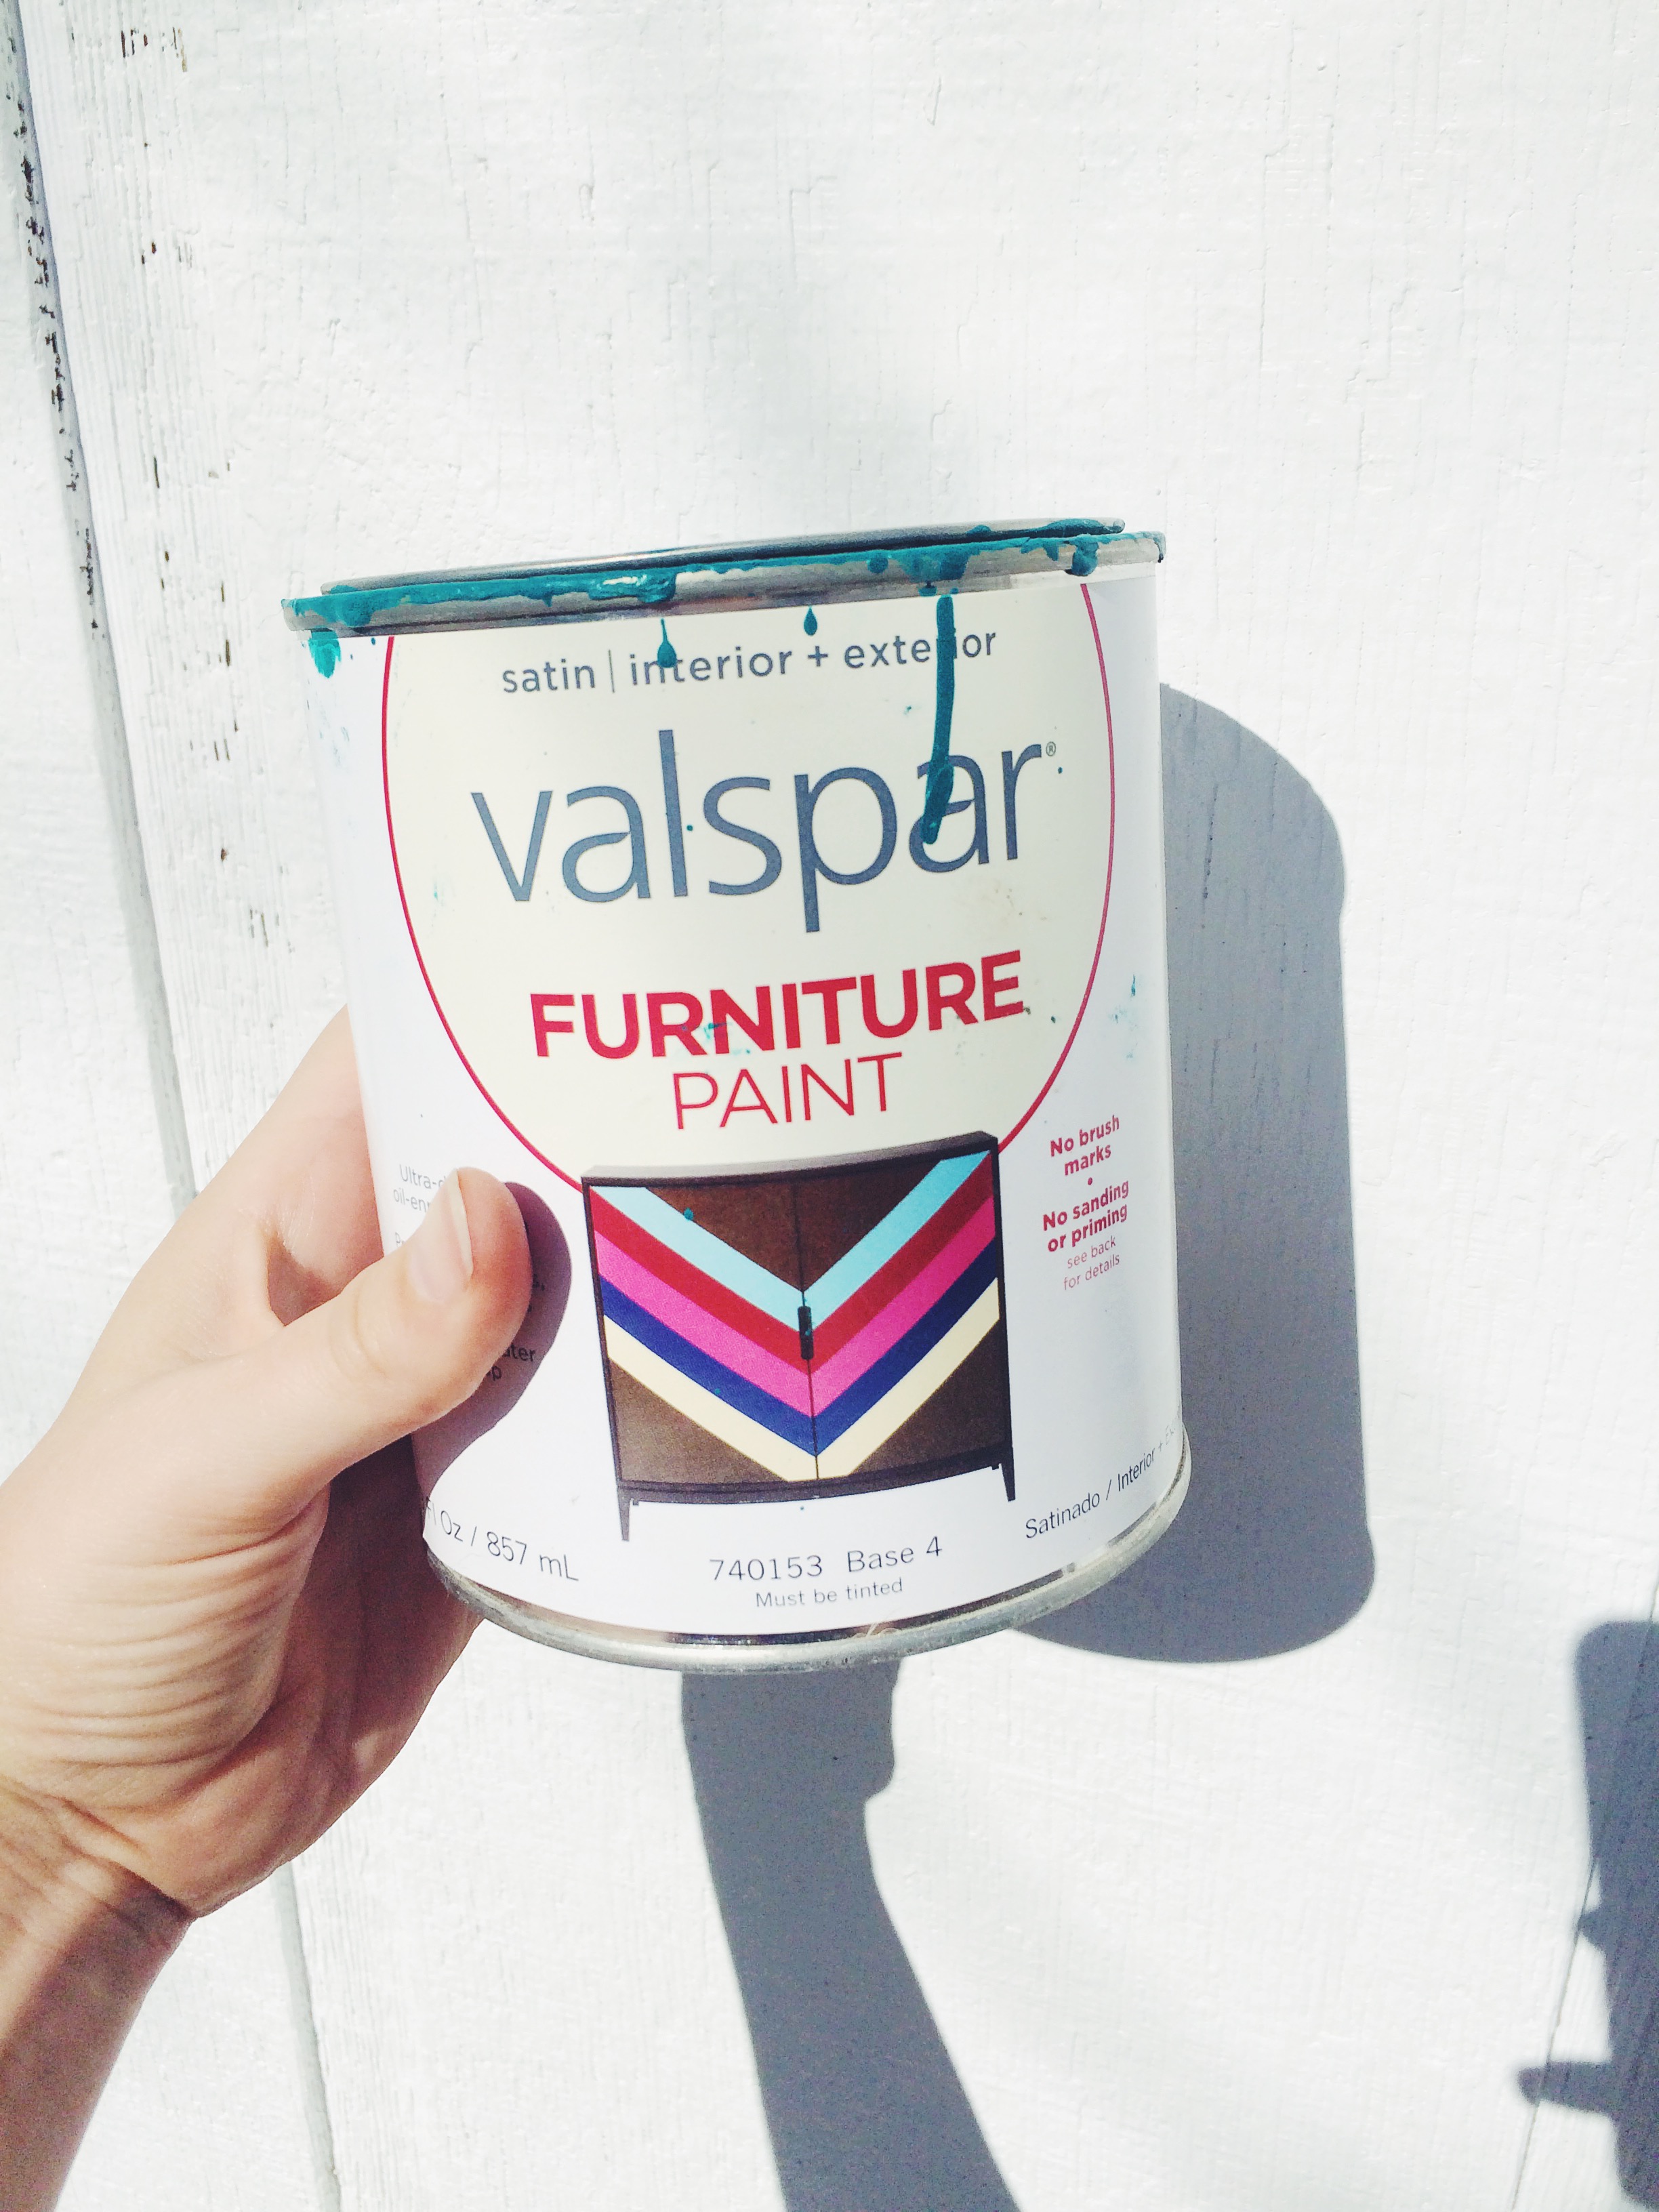
I wanted a rich blue green color and they had the perfect one called "Stained Glass"
I DID NOT SAND THIS COUCH. it truly was a miracle. I went over it with about 3 coats (my patience meter almost emptied... but I made it) and it dries so beautifully and doesn't show brush strokes. I was amazed. Valspar Furniture Paint for life. I know there are some surfaces that required light sanding before using this... it's all in the tiny instructions on the back of the paint can that I barely had the patience to read. But I just love how this turned out and I love the contrast of the cool green blue and warm rich gold cushions.

Project 3: Repurposed Vintage Map Wall

I have boxes of vintage maps. Like, an insane amount of them. So... I'm always trying to find ways to repurpose them or put them on display. I found this awesome world map at an estate sale and knew it needed to be on the center of one of our Lovely Yellow House walls.
I dug through and found all my favorites and then literally just started putting them on the walls and layering until there was no wall left to see. I knew I wanted this world map to be the center so it was the very last to go on.

Learn from my mistake, dear friends. I naively thought that sticky tack would hold all of these up. It doesn't. at all. not even a little bit. I got so frustrated as I would be pushing down the corners as hard as I could and then an entire piece I just finished with would fall down. Just don't. Sticky tack not for the win.
So I bought these lovely gold thumb tacks (because I love gold everything) at home depot and started from the beginning. So far it is still standing and it's been 2 months... so I'd say the map wall is here to stay. Which is good because I love it.


So whether you have maps or vintage prints, sheet music or book pages... repurpose and make a feature wall in your house! I get a little giddy every time I look at our map wall. It's just awesome. Maps were great for me because they are so large and it look maybe a few hours to hang them all up. I loved it.
Do What You Can…
At the end of most blog posts I love to give you a little inspiration so here is a little design I created…

I hope you enjoyed these ideas... please tag me on all the social medias if you ever try them! I'd love to see and comment with alll the heart eye emojis!
Know you are loved, sweet souls.
Love,
The Lovely Adventurer